How To: Sync Users and Groups with Assetbots Microsoft Entra ID Integration
Engineering Team
1. Enable the Microsoft Entra ID integration in your Assetbots database
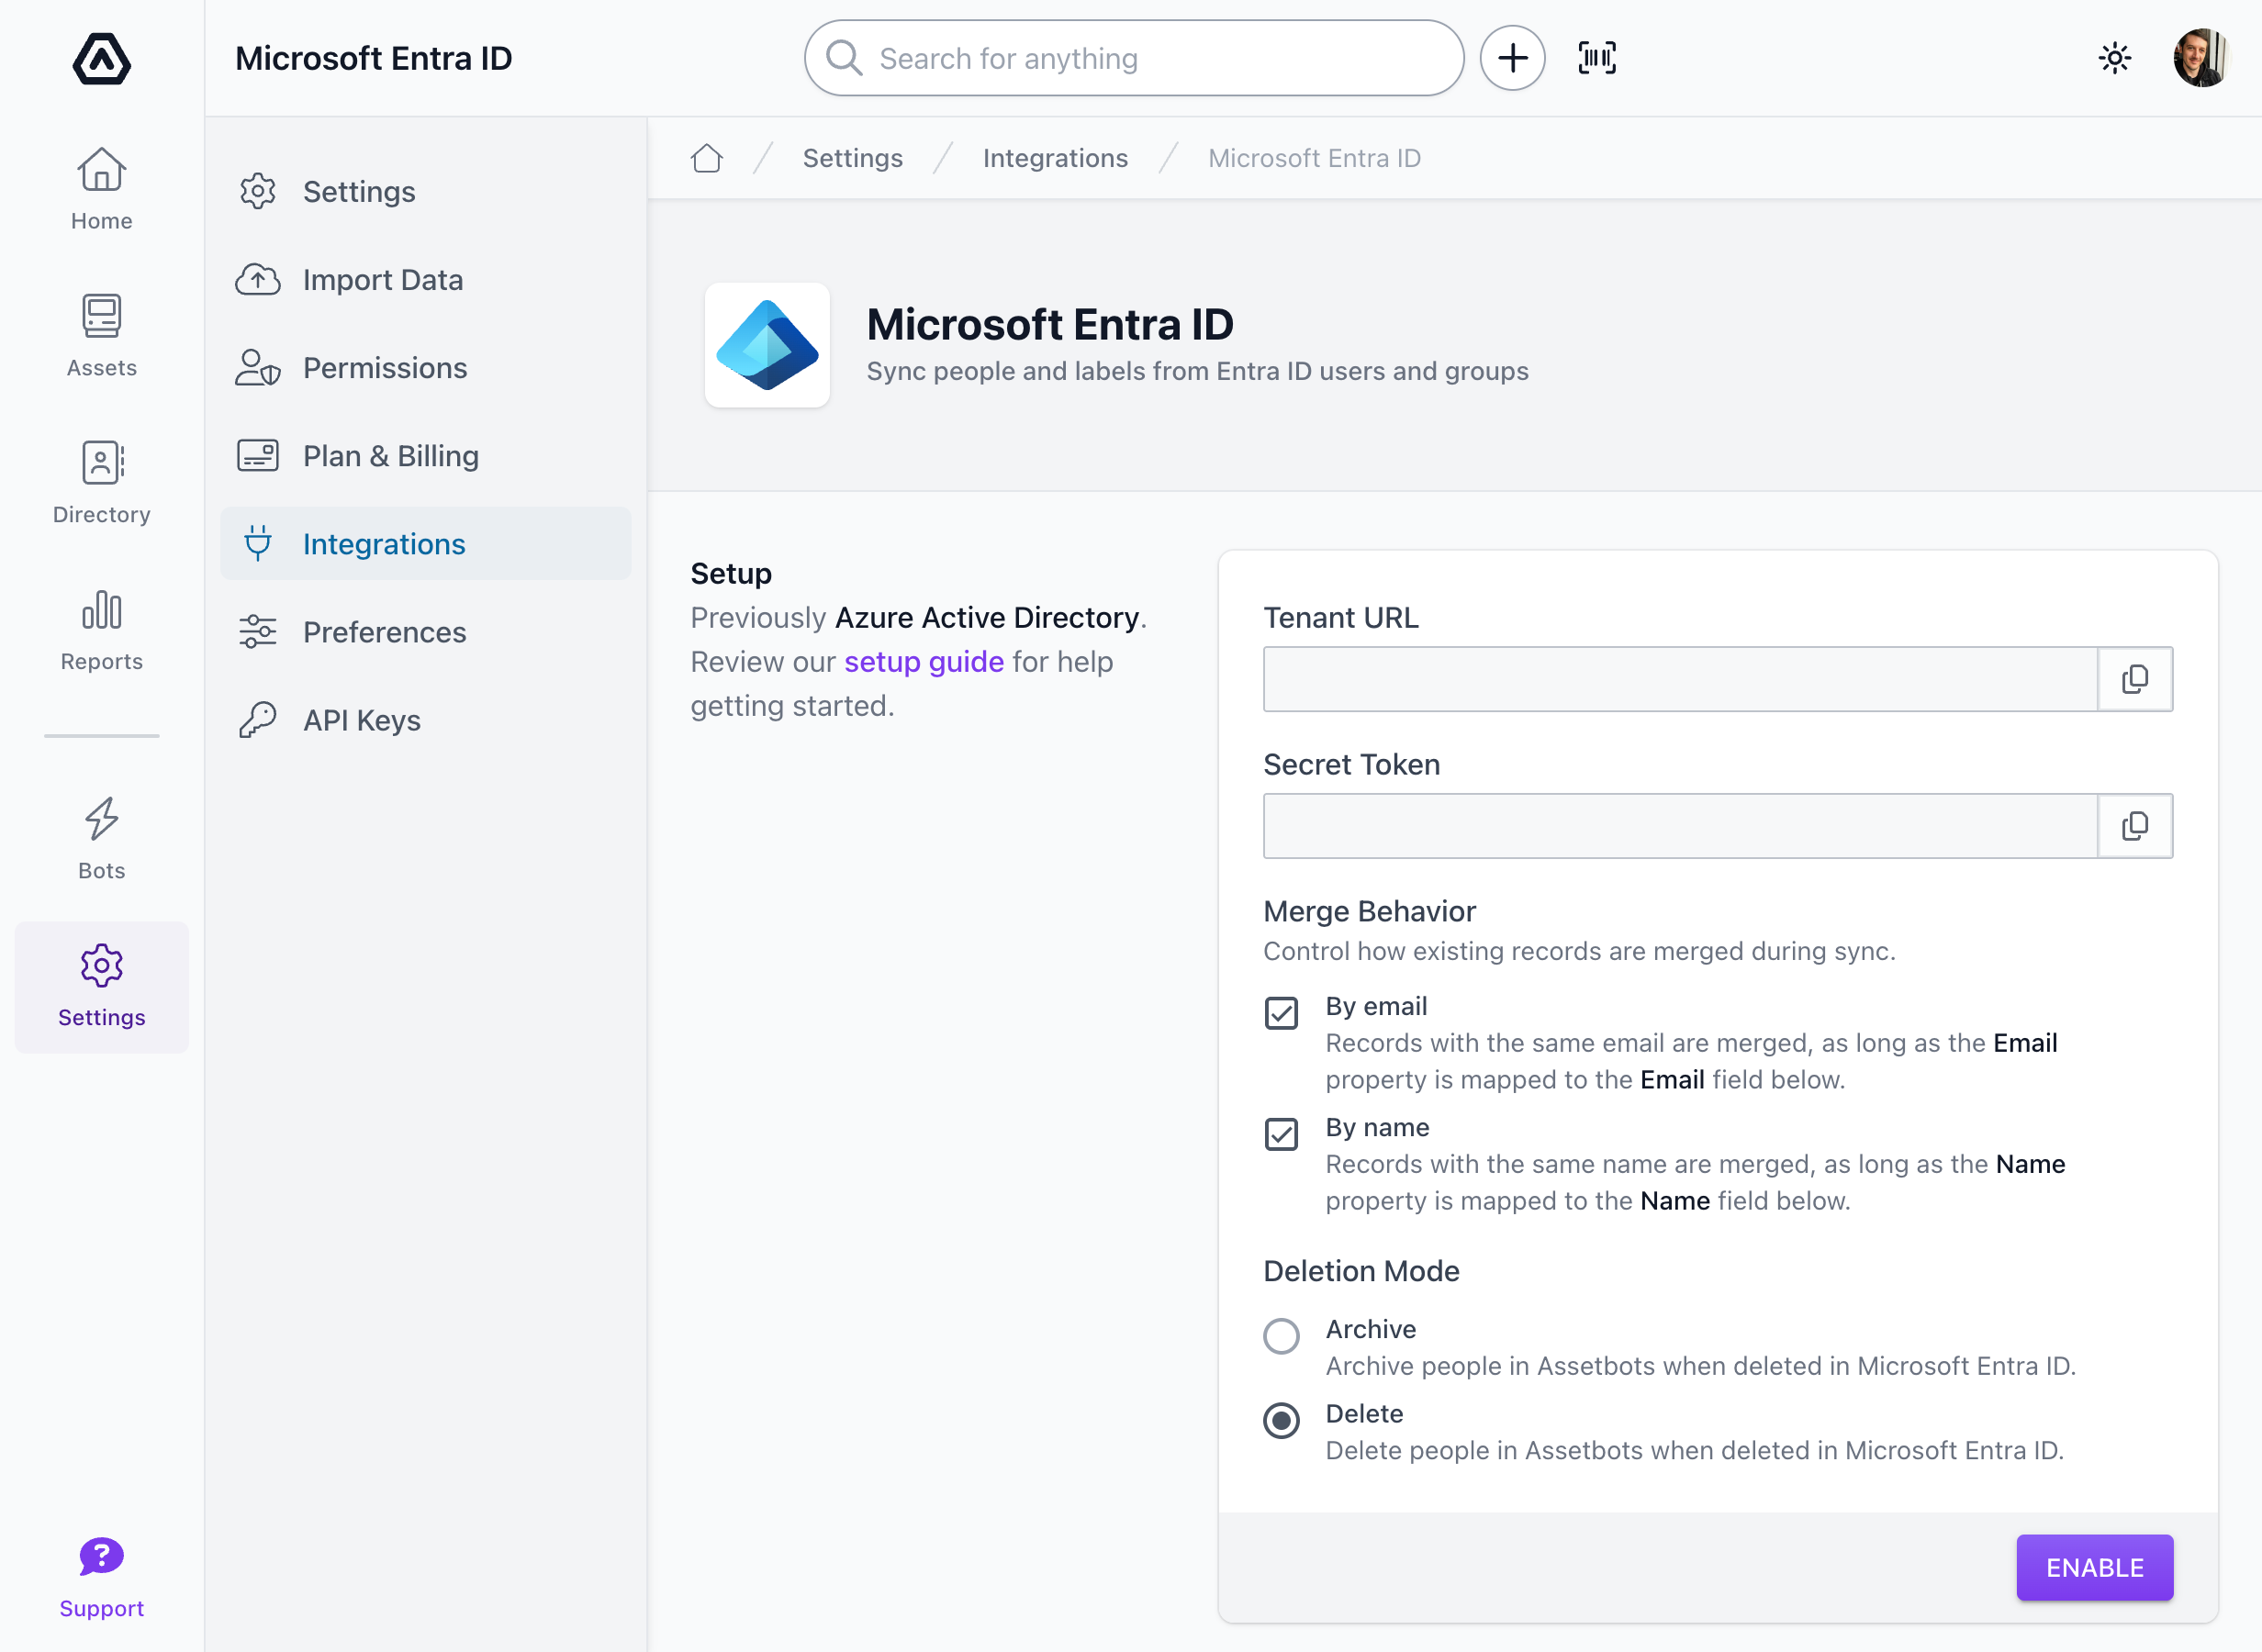
Visit the Integrations page under Settings and find the Microsoft Entra ID entry. Click Enable to enable the integration and reveal your tenant URL and secret token.
Important: You must be a database Owner or Administrator to perform this step.
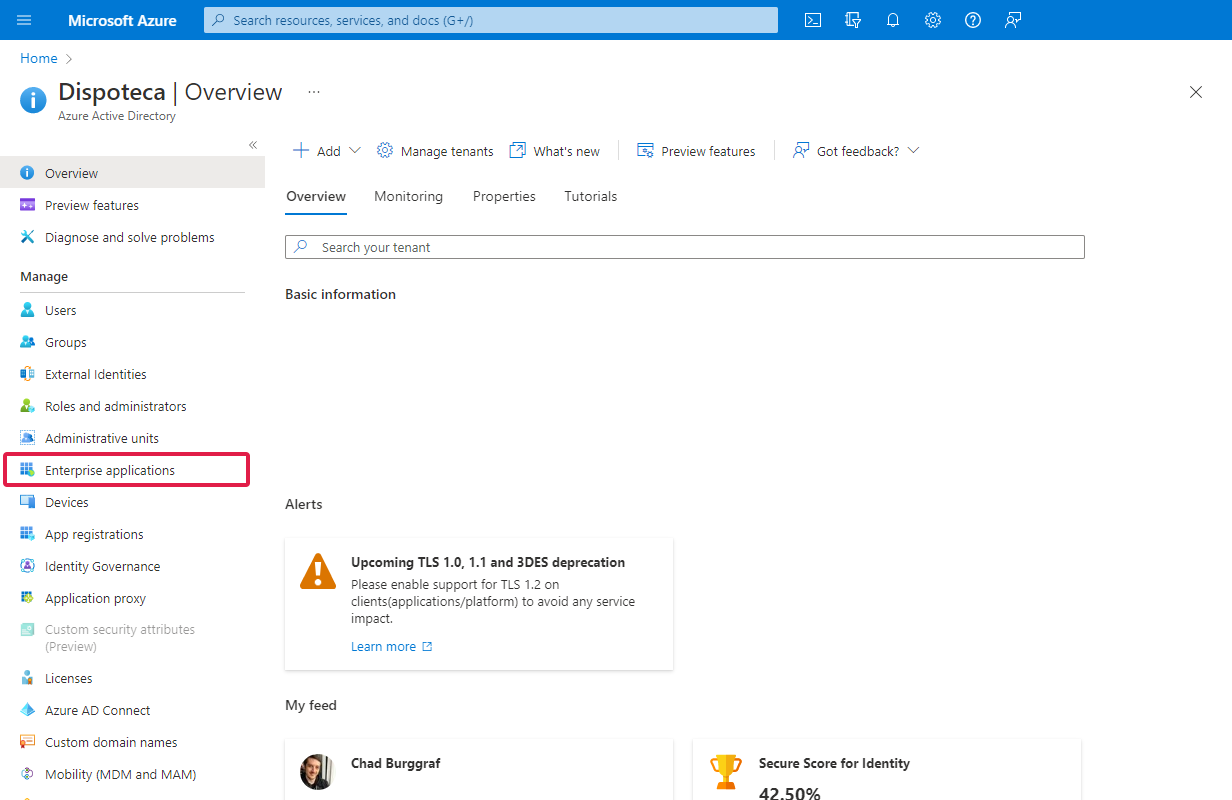
2. Log in to your Microsoft Azure account
Visit https://portal.azure.com/ and navigate to your Active Directory tenant by clicking on Microsoft Entra ID on the homepage or sidebar.

3. Create a new enterprise application
Click on Enterprise applications in the sidebar, and then New application in the top bar. Next, click Create your own application in the top bar.
Choose a name for the application (we recommend Assetbots or Assetbots SCIM for easy reference in the future) and choose Integrate with any other application you don’t find in the gallery (Non-gallery).
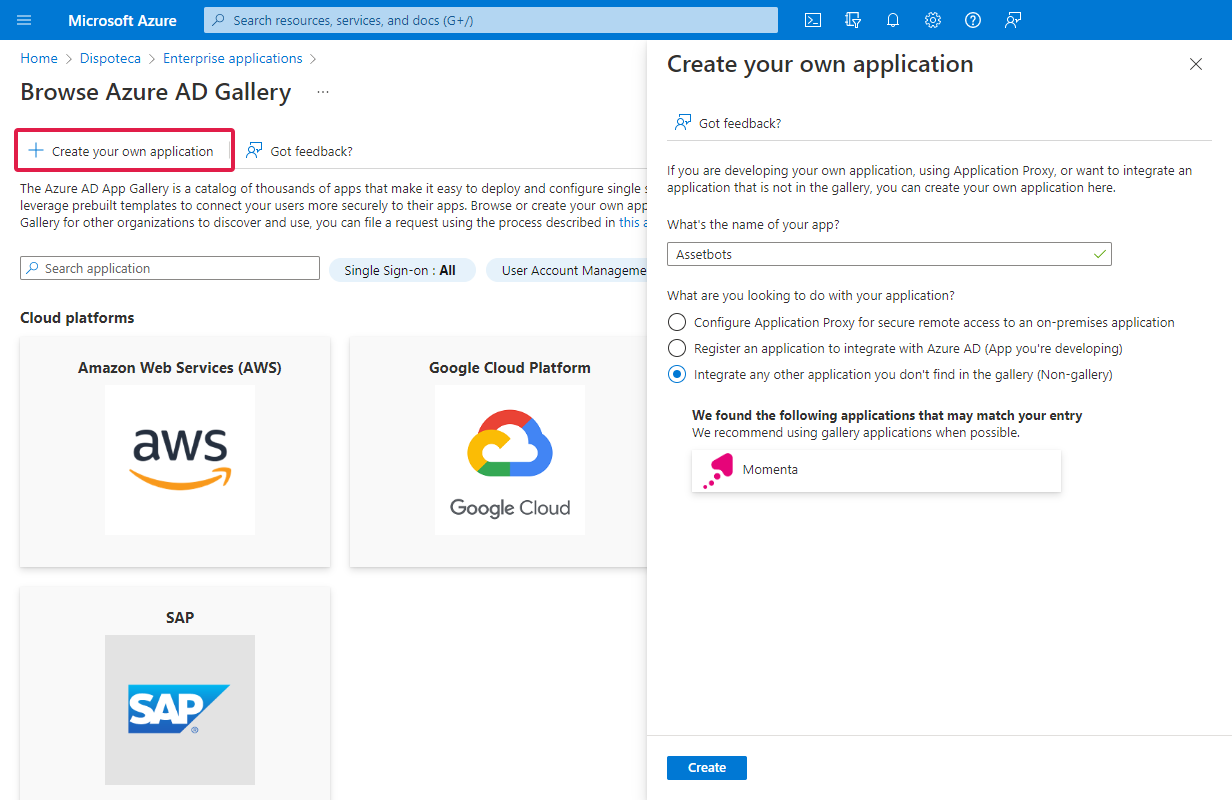
Click Create and you will be taken to your new application’s overview page.
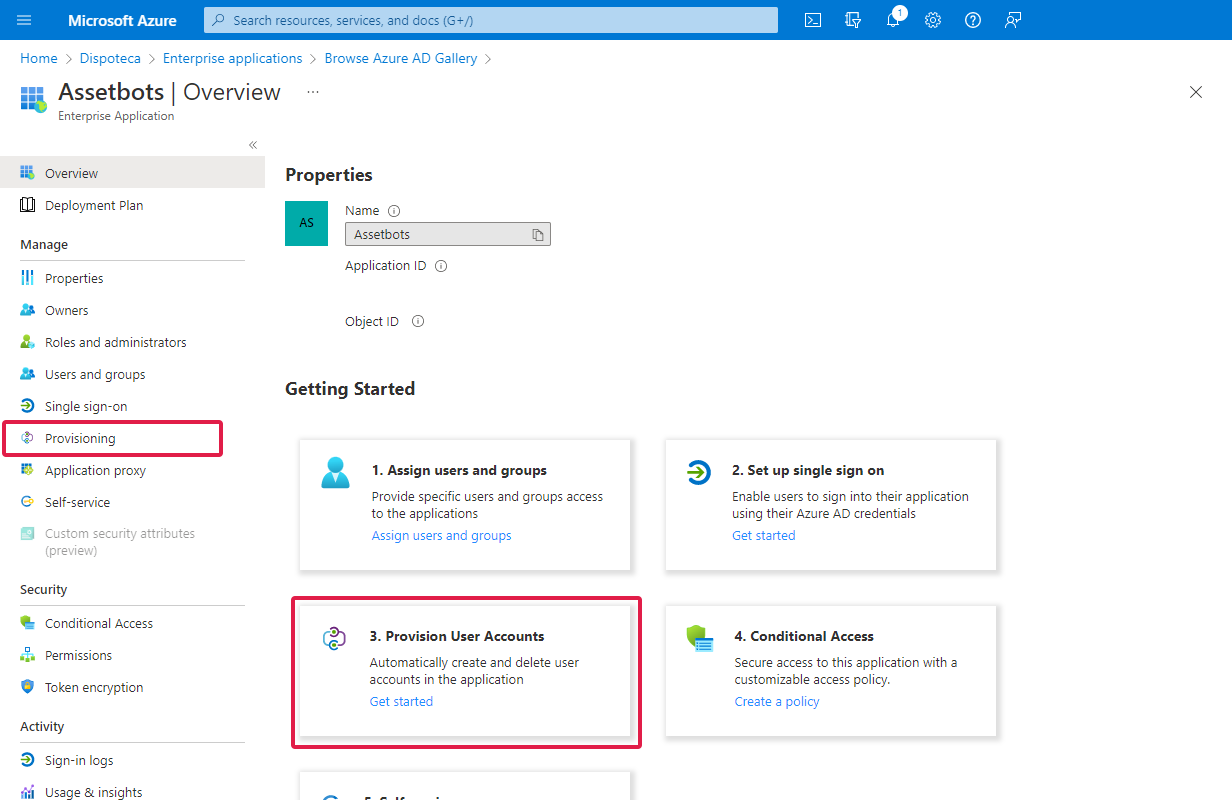
4. Enable provisioning
Click Provisioning in the sidebar or 3. Provision User Accounts on the overview page and then click Get Started.
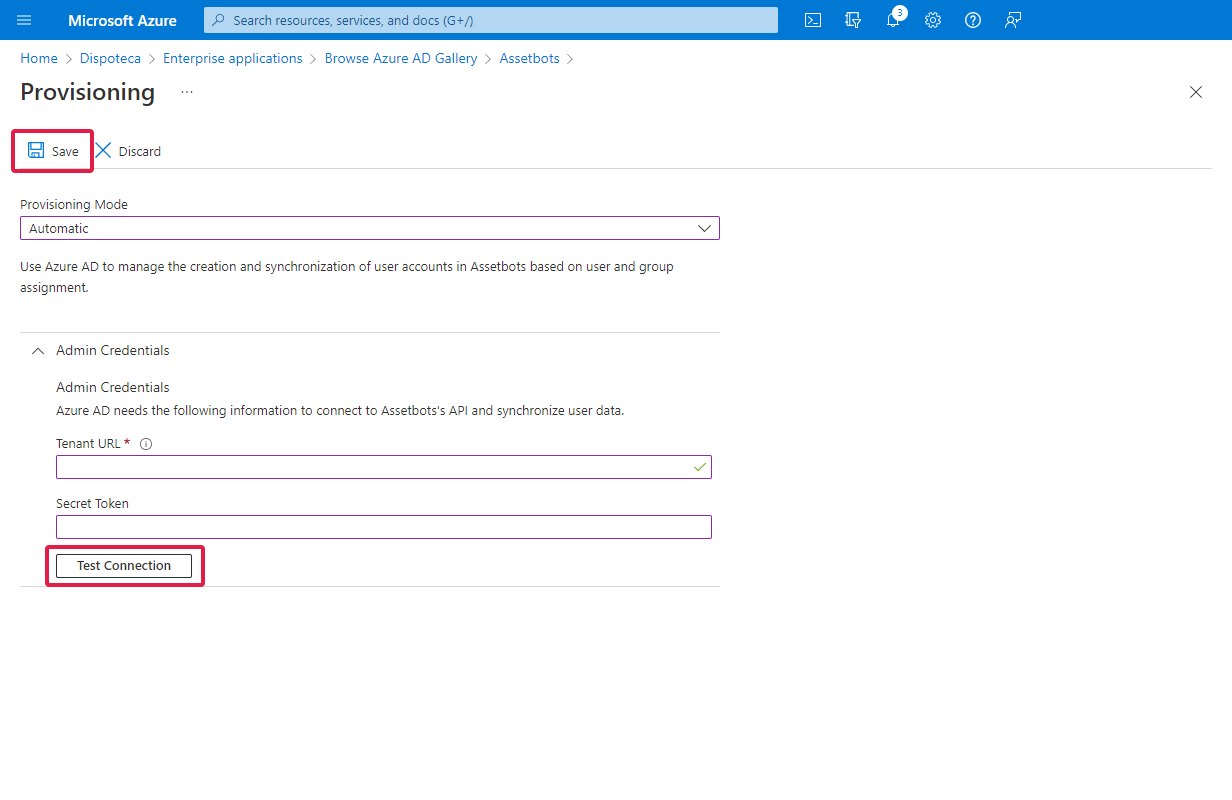
Choose Automatic as the Provisioning Mode. Next, expand the Admin Credentials section. Copy the tenant URL and secret token values revealed in Step 1 to their respective fields under Admin Credentials.
Click Test Connection to verify that Azure can talk to Assetbots successfully, and then click Save in the top bar.
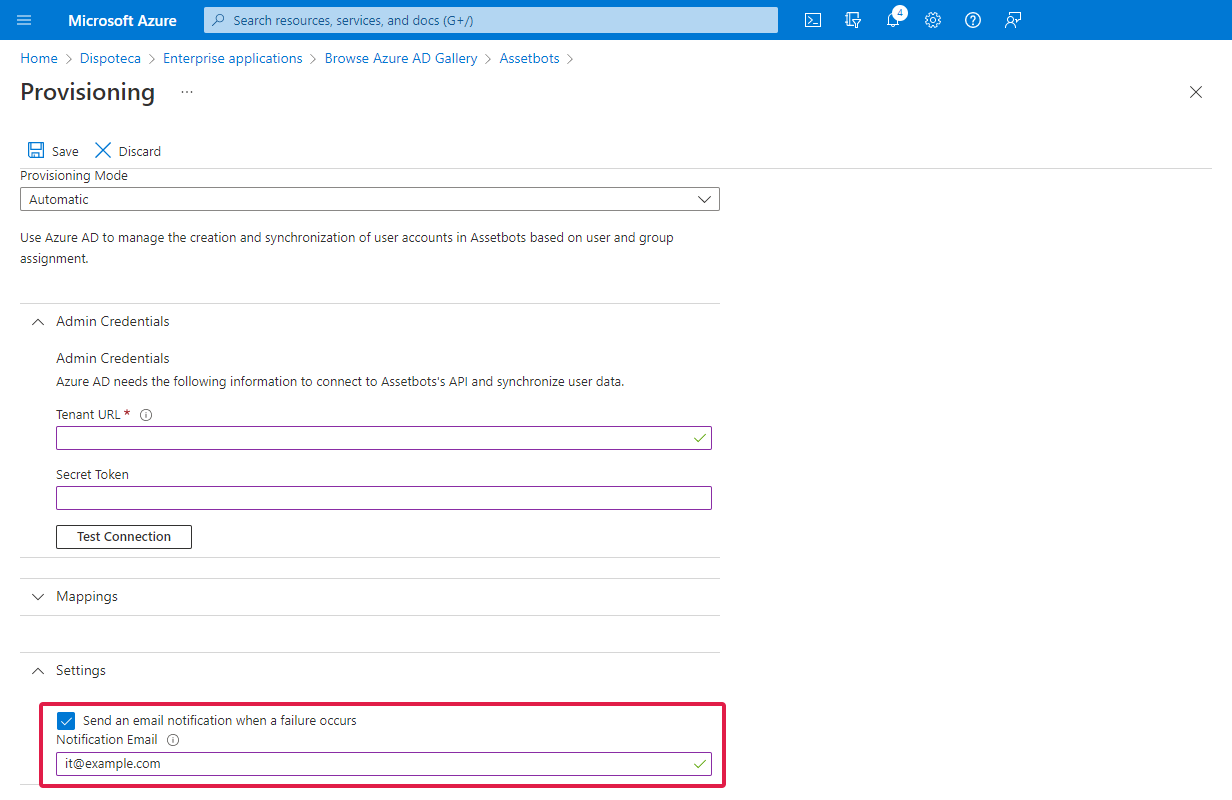
Optional: Get notified when there is a sync failure
Expand the Settings section and check Send an email notification when a failure occurs. Enter the email address you would like to be notified at.
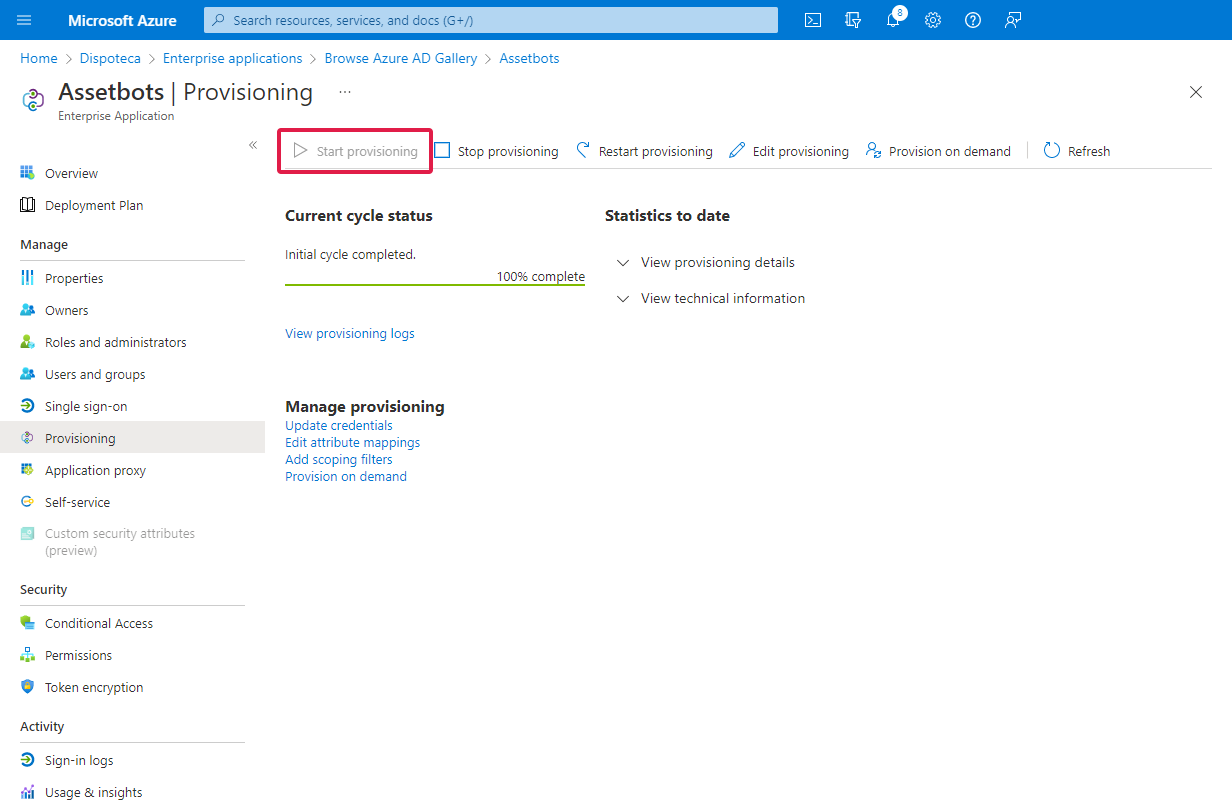
5. Start provisioning
Navigate to your enterprise application’s provisioning overview page. You can access the provisioning overview page from the provisioning configuration page using the breadcrumb links at the top or closing the configuration pane.
Click Start provisioning in the top bar.
6. Choose which users and groups to sync
You can either sync all users and groups in your Entra ID tenant to Assetbots, or you can explicitly assign users and groups to your enterprise application, which will cause them to be synced to Assetbots.
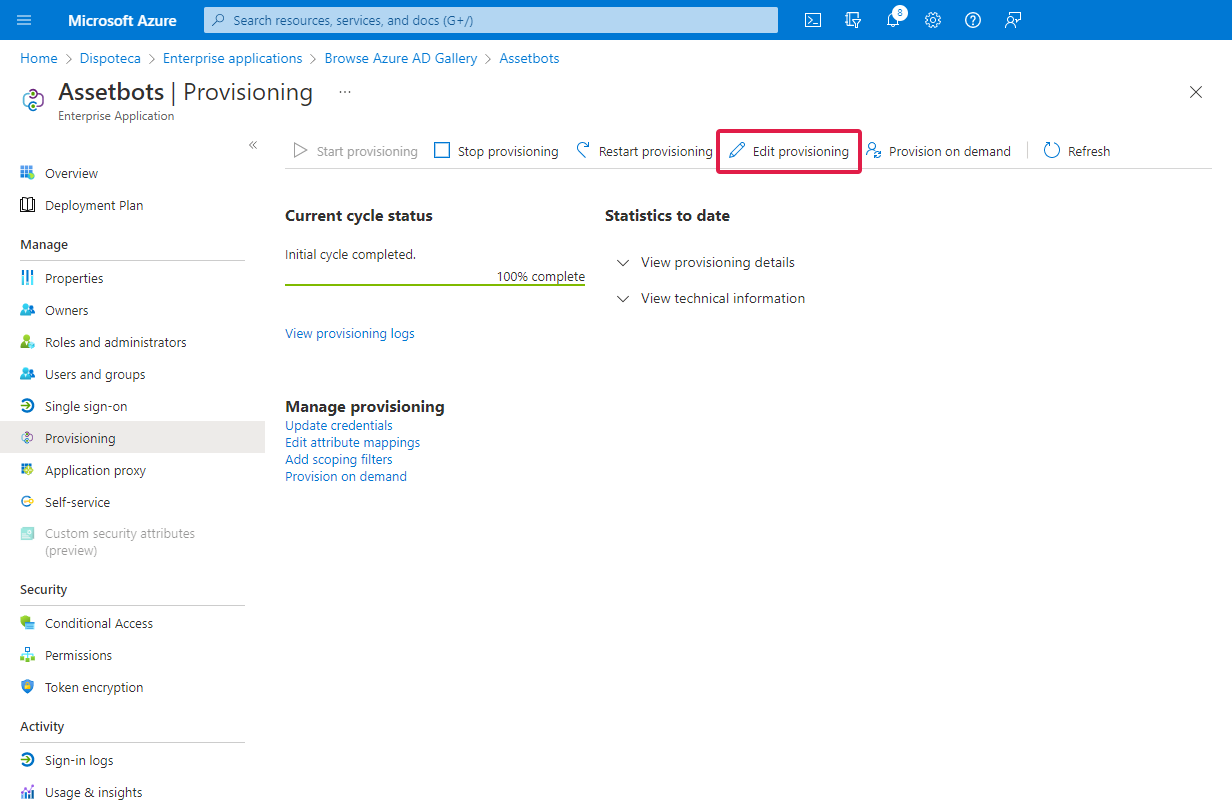
Sync all users and groups
To sync all users and groups, navigate back into your provisioning configuration by clicking Edit provisioning in the top bar.
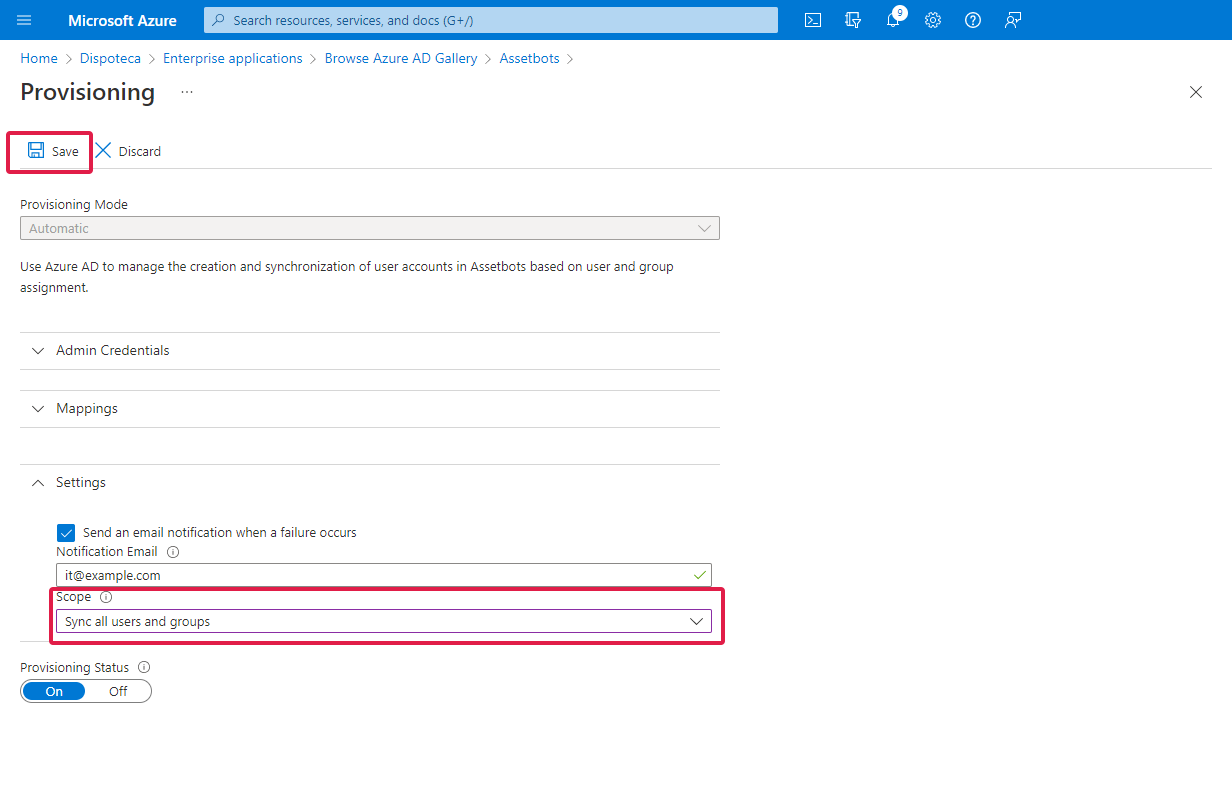
Expand the Settings section and change Scope to Sync all users and groups. Click Save in the top bar.
Sync specific users and groups
To sync only specific users and groups, click Users and groups in the sidebar, then Add user/group in the top bar. Add any users and/or groups you would like to sync with Assetbots and then click Assign.

Setup Complete
You’re all set! Azure will sync your Entra ID users and groups with Assetbots every 20 – 40 minutes.
Important notes:
- Entra ID groups are synced as Assetbots labels. Labels are automatically created, deleted, applied and removed during synchronization.
- Disabled Entra ID users are deleted from the Assetbots people directory. Any open checkouts will remain open, and deleted people are accessible using the Deleted filter.