Create “Computed” Fields to Measure Age
New Feature
We’ve created a new field type called Age that can be added to any record that supports custom fields (e.g., Assets, People, Locations, Repairs, and Reservations).
This is our first Computed field, and we’re excited about the types of abilities we can unlock for our users using this concept in the future.
A computed field is one that does not directly hold any data, but instead uses data in other fields to generate a value. For Age fields, you specify another Date or DateTime field and it will calculate the difference between now and the related field’s value.
Assetbots supports specifying the unit of calculation (either days, weeks, months or years) as well as the direction (past or future).
Two common examples of using this field now ship with our Business and Technology templates:
- Calculate the age of an asset, from when it was acquired until now, in years.
- Calculate the amount of time remaining on an asset’s warranty, in months.
It’s super easy to create your own Age fields too:
- Visit the list of records you want to create the field for (e.g., the Asset list), click the More actions menu button and select Edit asset fields.
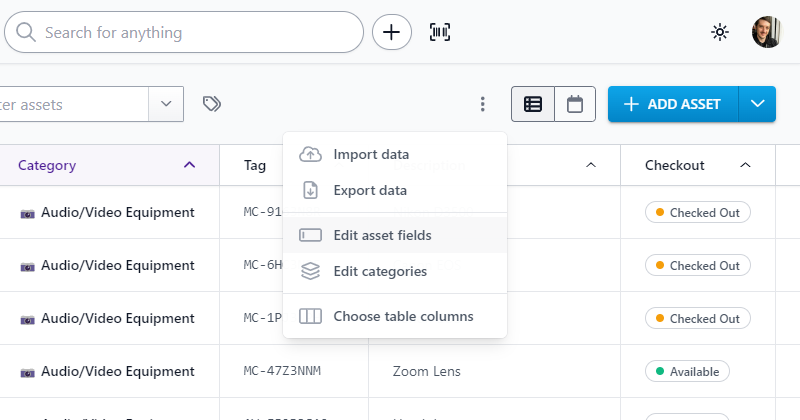
- In the Asset Fields dialog, click Add Field and select Age for Field Type.
- Enter the name of the field (e.g., Warranty Remaining) and configure the age calculation for your scenario.
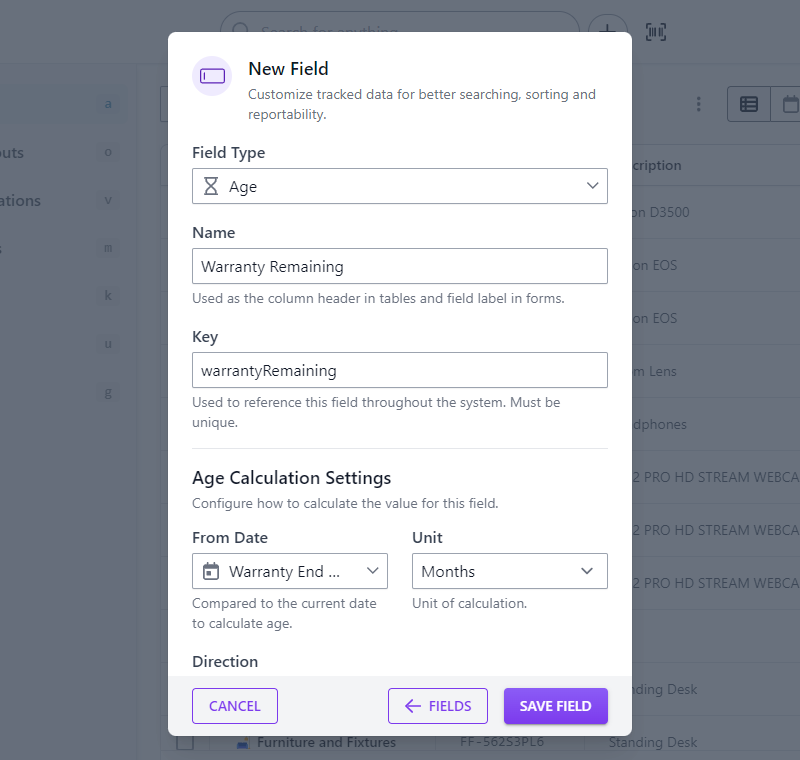

- Click Save Field and you’re done! Feel free to drag your new field to a different spot in the field list.
Please let us know what other kinds of computed fields you’d like to see (we already have a number on our roadmap but would love your input too!).
Happy tracking!